Sunday, December 4, 2016

Introduction to Bootstrap Framework


An introduction

 Originally named as Twitter Bootstrap, is one of the most popular projects on GitHub of all time. It is an open source framework for front end web designing. In simple words, it is a prepared software framework that is created to make the designing friendly and more standard-compliant using HTML, CSS, SASS and JavaScript and is free to use. Mark Otto and Jacob Thornton were the creators of Bootstrap at Twitter.

Unlike many frameworks, it is not just a simple library of predefined elements and styles but is a framework that provides a structure. It includes predefined classes and powerful mixing for generating the minor layouts. It includes a responsive, mobile first fluid grid system that appropriately scales up to 12 columns as the device or viewport size increases.

But Bootstrap also have its own limitations and cons .Here is some of the main advantages and disadvantages of Bootstrap which will help you to decide whether use or not use Bootstrap in your projects.

 Let’s start with the advantages:

Compatibility with all the latest Browsers: No matter it is mobile or desktop browser, Bootstrap works in all the latest browsers, while the display might differ in old browsers.

Friendly customization: Bootstrap can be customized easily and with fewer efforts as it provides web based customization.

Mobile first attitude: Since Bootstrap version 3.0, it has been mobile first and thus it is a need of time when mobile internet users have outnumbered the desktop users. 

Fortifies Sass usage :  Bootstrap is written in Sass that provides it, a lot of flexibility. Also, the Sass users will surely get an edge. 

Important jQuery plugins supported: Bootstrap has lots of useful jQuery plugins that are useful in many situations and work best if not customized.

Some disadvantages:

Hard to customize jQuery plugins: The quality of the jQuery plugins is not good and is often hard to customize.
Bootstrap websites are similar: Bootstrap websites looks pretty much similar but it can be avoided by creating custom theme or a self-developed theme.
Hope you have now developed a rough sketch of Bootstrap in your mind. Now we will proceed for the Environment Setup in this Bootstrap tutorial.

It is very easy to setup and download Bootstrap as it weighs only few MBs. Just open the official website of Bootstrap; where you will get the latest version of Bootstrap.
Now after hitting the button download you can see three options that are as follows

Download Bootstrap

This will download you the pre-compiled and minified version of Bootstrap CSS, JavaScript, and fonts without original source code and documentation. This is a standard download go for it if you are new to Bootstrap.


Download Source

This will download you the Bootstrap Sass and JavaScript source code directly from GitHub. Actually it is the precompiled CSS, JavaScript, and font assets, along with source Less, JavaScript, and documentation.


Sass

Bootstrap has been now ported from Less to Sass. It eases its inclusion in Ruby on Rails, Compass, or Sass-only projects. It’s ready to drop right into your Sass powered applications.


Tutorialsplane offers comprehensive Bootstrap Tutorial for beginners step by step which are made exclusively for learners to understand easily. Each and every steps are taught with easy examples that will provide better understanding of the concepts. Find more web and mobile application development tutorials at Tutorialsplane only!

Wednesday, November 23, 2016

MAKING LISTS WITHIN IONIC FRAMEWORK


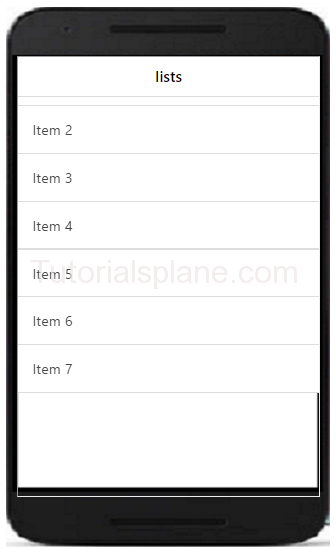
Ionic Listing is one of the strongest features of this framework with drag to reorder, editing, swipe to edit and pull to refresh can be introduced inside these coding structure with the use ionic directives only. Displaying Ionic List in this application framework requires you to follow some basic rules which involve using specific classes for ‘ul’ and ‘li’ element in HTML 5 code with list and item respectively. Applying the code will result in the below image directly as it has default code for making things easier with just HTML5 basic layout skills.

capture-lists

 For better organizing and grouping one can also add the List dividers to specific ‘li’ for making sure they have proper difference in the navigation structure with respect to user behavior. This provides different color and font-weight to that specific ‘li’ item from the rest displaying it as the parent and child. One can also simply add icons to this Ionic list example with <i> tag only using position item-icon-right for right and item-icon-left for left. You can add these classes to their parent tag for ‘i’ element for regular behavior. 

Item Avatar functionality is available too with images as default round using border radius property. For displaying large thumbnails inside ionic list there is default code with item-thumbnail which can be given the position left or right specifically to match the requirements of the design respectively. Using Inset Lists this whole structure is designed to avoid the full-width layout structure as well to show better designing capabilities. 

Start learning Ionic tutorials with Tutorialsplane authentic guide especially for beginners, they are step by step explaining the use of all the basic fundamental of this amazing Ionic Framework. For freshman and newbie learners this is the place to start their mobile application learning skills with easy examples, syntax and live demo for understanding the depth of this mobile framework coding. Here you go through all the CSS components and JavaScript Components for strengthen your core basic as well Ionic FAQ that will prepare you for the complex situations in your career ahead.  


HOW TO MAKE AND ALIGN BUTTONS IN IONIC FRAMEWORK EASILY?

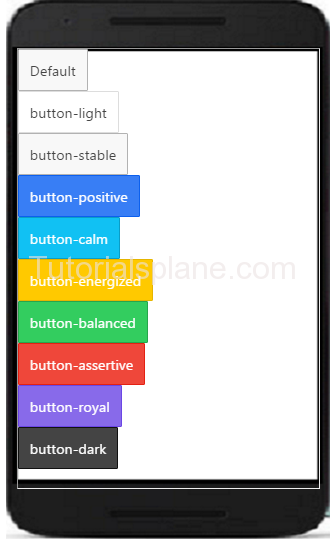
Ionic provides rich default functionality for creating buttons within its framework only. Creating Buttons with Ionic framework is done with the help of basic html tags only. For better mobile experience developer must create buttons that are easy for user behaviour and provide clear display of their functioning with its purpose respectively. We have created ionic button example with syntax and code that can help you get the basic understanding of the Ionic learning.
capturebuttonoutput
There are many basic button class attribute being applied to this their framework i.e. default, light, stable, positive, calm, energized, balanced, assertive, royal and dark. One just need to the specific class to their respective tag for making the applied changes to the structure successfully. Button can be block, full width, outlined, clear and with icons to place them in headers and footers respectively.
Aligning buttons to the exact place provides proper navigation and adds to its design perspective as well.  Whole code is based on html dependant structure with specific classes being attributed to their respective alignment. Left is the default position with ‘text-align’ class being attributed to it. For ionic center button use the class ‘text-center’ which will align the button in the center of the screen whereas ionic align right will put the button ‘text-right’ on the right corner of the screen respectively.
Tutorialsplane offers rich source for learning Ionic Framework tutorial for beginners with step by step expert guidance. Find more quick fixes, solutions and live examples to get into mobile development experience with our online tutorials.  From basic CSS components to JavaScript components you will learn each part with steps, example and live editor to make your level to next step in these exclusive tutorials built to help beginners in mobile application development.

Source:- Make and Align Buttons in Ionic Framework

MAJOR COMPONENTS OF IONIC FRAMEWORK

Within a few short span of time period of its beginning Ionic Framework has gained a reputation for mobile application development in this new I.T. generation. With mobile apps forming the core of modern gadgets with new technology advancements, Ionic can be the one solution our future can bank upon with exemplary results. Most of the inner working of Ionic is based on angular only that has major role in the structure of this programming language. For beginners one must understand the basic fundamentals of Ionic by starting with these components.

CSS Components

These are more basically related to the design of the mobile application. If you know the right classes to be applied than you can use the direct in-built functionality for better results easily. Header, Footer, Content, List, buttons, Cards, Forms, Toggle, Checkbox, Radio buttons, toggle, range, select, tabs, grid and utility form the CSS component of the ionic framework. For example: – For Ionic Content the directive to be added i.e. similarly these things allow you to add basic functionality without any added directions in the code. Similarly for making effective color change one just need to add the respective class to their elements.

JS COMPONENTS

JS adds more practical effects and solutions to the Ionic framework along with its CSS components. Each of these functions when added with its CSS part gives amazing results that constitutes the Ionic platform. Actionsheet, Backdrop, Keyboard, loading, modal, Navigation, popover, popup, Scroll, Side Menus, Tabs, tap and click are some of the JS functionality which are customized to meet the requirements of the project. For example: – With Ionic Scroll one can create scrollable area inside the app.
Overall Ionic provides vast in-built functionality with CSS and JS components. There are also numerous extensions through which codes are accommodated to meet the project requirements. There is also CLI utility with Ionic which runs from shell/terminal which makes it easy to build, run and emulate the mobile apps in Ionic. Our Tutorialsplane online platform is equipped with Ionic framework tutorial for beginners step by step with expert guidance. Suitable examples and codes are provided for simple explanations. Find comprehensive information for learning this new mobile application programming language at our online tutorials now!


Source:- Major Components of Ionic Framework

HOW IONIC MODAL WORKS?

Ionic modal is the part of the JavaScript component of the Ionic basic fundamentals. It features as the content pane over shadowing the regular content. This is called upon when the user looks for different choice or editing a particular item respectively. is the standard tag in which content is placed for using in Ionic Modal respectively.
Controller code is explained below for use in modal part of this application development programming. Ionic modal controller includes basically the following main methods.
  • show() shows the modal instance when called upon
  • hide() respectively hides the ionic modal
  • remove()this command removes the modal part
  • isShown()checks the status of the shown modal in Boolean
Remove () is called whenever the each model is to be closed and to avoid further integration as necessary.
A perfect Ionic modal example must include the use of HTML part and controller part for students to learn the understanding the use of both as separate & individual units both. So they can learn to use them both i.e. Template and regular HTML version file with script tags specifically.
ionic modal example
Tutorialsplane ionic tutorial for beginners are written with step by step and with expert guidance providing comprehensive knowledge for learning this language. This basic guidance will take you on the path for becoming a expert in Ionic Programming. Once can easily start making mobile apps in both native as well as hybrid environment in this highly useful Ionic Language. Its completely free open source SDK, so one can use them personally and commercially without any hassle. Built along with HTML5 framework, Ionic is used to build future mobile apps with incredible results to sustain the modern challenges.

Source:- Ionic Modal